In this article, I will show you how to properly upload a file to Moriya Shrine.
Upload Format
First, we have a standard in terms of formatting for the description that needs to be added.
Note: This is a minimal general guideline. You can add more stuff to it if you'd like. But at the VERY minimum, it needs to have the below information. Everything in the " < > " are notes. Replace with your information. Depending on the file, not ALL entries will apply.
Please see template below:
Type: < what type of file are you uploading? i.e 2D fighting, mp3, .zip)
Developer: < name of the author/developer of the file, even if it's you >
Publisher: < same as developer, even if its you>
Release: < when was the file released/published >
Language:< language the file is in >
Please enter the required fields for the above.
Description
< This is where you will add a description to the file. how to use, run, play, etc. Be as descriptive as possible and also you can add any other URLs or supplemental information here as well >
Upload Page
Now that we have the format, lets upload our file by going to "Downloads" and selecting the category on the left of where your file is going to be uploaded to.
In my case, I will be uploading a fan game.
I will now explain the "Add resource" page:
- The "Title" field is, well, pretty self explanatory.
- The "Tag line" can be a very brief explanation of your file or you can simply put the dev/author, this will be shown on the index page of the downloads category.
- The "Type" field is how you are going to provide the download to users. You can upload directly to Moriya Shrine by simply attaching the file OR you can use your own external source.
-The "Description" box is where you will place the format that we have demonstrated above.
The "Attach files" button below the description box is where you add any images and/or supplemental files for your file. If uploading screenshots, make sure they are inserted as a thumbnail into the description box as it will look more cleaner that way when it's presented.
The "additional information URL" is there for you to provide optional information of the file.
The last part is "Upload a new icon" where you will upload image for your file that will appear on the left. Otherwise, it will have a default image of a gear.
A complete upload looks like this.
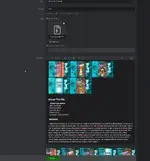
Note: Make sure that the uploaded files has a zipped folder appearing. This indicates that the website has processed the file and is ready to be saved.
That is it!
As time goes on and features become added, this page will be updated.
Upload Format
First, we have a standard in terms of formatting for the description that needs to be added.
Note: This is a minimal general guideline. You can add more stuff to it if you'd like. But at the VERY minimum, it needs to have the below information. Everything in the " < > " are notes. Replace with your information. Depending on the file, not ALL entries will apply.
Please see template below:
About This File
Release InformationDeveloper: < name of the author/developer of the file, even if it's you >
Publisher: < same as developer, even if its you>
Release: < when was the file released/published >
Language:
Please enter the required fields for the above.
Description
< This is where you will add a description to the file. how to use, run, play, etc. Be as descriptive as possible and also you can add any other URLs or supplemental information here as well >
Upload Page
Now that we have the format, lets upload our file by going to "Downloads" and selecting the category on the left of where your file is going to be uploaded to.
In my case, I will be uploading a fan game.
I will now explain the "Add resource" page:
- The "Title" field is, well, pretty self explanatory.
- The "Tag line" can be a very brief explanation of your file or you can simply put the dev/author, this will be shown on the index page of the downloads category.
- The "Type" field is how you are going to provide the download to users. You can upload directly to Moriya Shrine by simply attaching the file OR you can use your own external source.
-The "Description" box is where you will place the format that we have demonstrated above.
The "Attach files" button below the description box is where you add any images and/or supplemental files for your file. If uploading screenshots, make sure they are inserted as a thumbnail into the description box as it will look more cleaner that way when it's presented.
The "additional information URL" is there for you to provide optional information of the file.
The last part is "Upload a new icon" where you will upload image for your file that will appear on the left. Otherwise, it will have a default image of a gear.
A complete upload looks like this.
Note: Make sure that the uploaded files has a zipped folder appearing. This indicates that the website has processed the file and is ready to be saved.
That is it!
As time goes on and features become added, this page will be updated.
Last edited by a moderator: